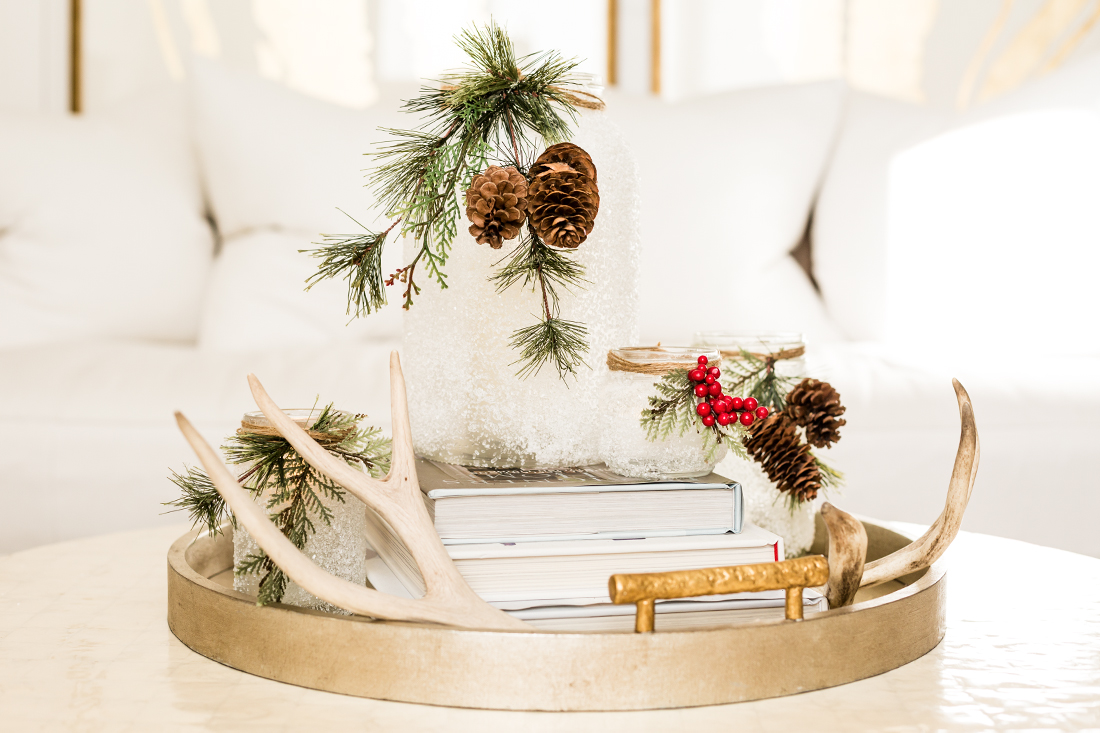
 Are you ready for our easiest DIY yet? No seriously, if we can do it, anyone can! Not only are these Snow Covered Mason Jar Lanterns so easy to make they make for the perfect holiday decor piece in your home! They’re simple, inexpensive and look beautiful anywhere! They can be placed outside, next to your fireplace, on your coffee table, as a centerpiece on your kitchen table, or on a bookshelf. The possibilities are endless!
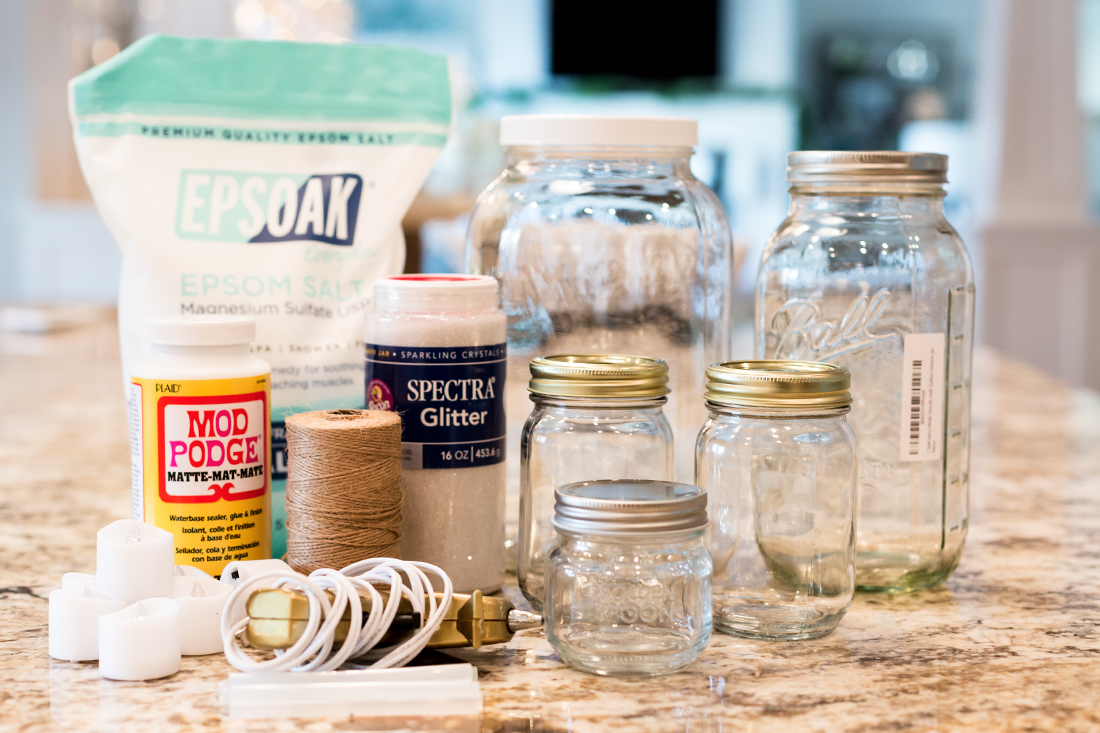
Here is what you’ll need:
Mason Jars
Epsom Salt
Clear Glitter
Mod Podge
Twine
Tea light candles
Hot glue gun and glue
Foam paint brush
*All materials can be found on amazon and we picked up the greenery at our local craft store!*
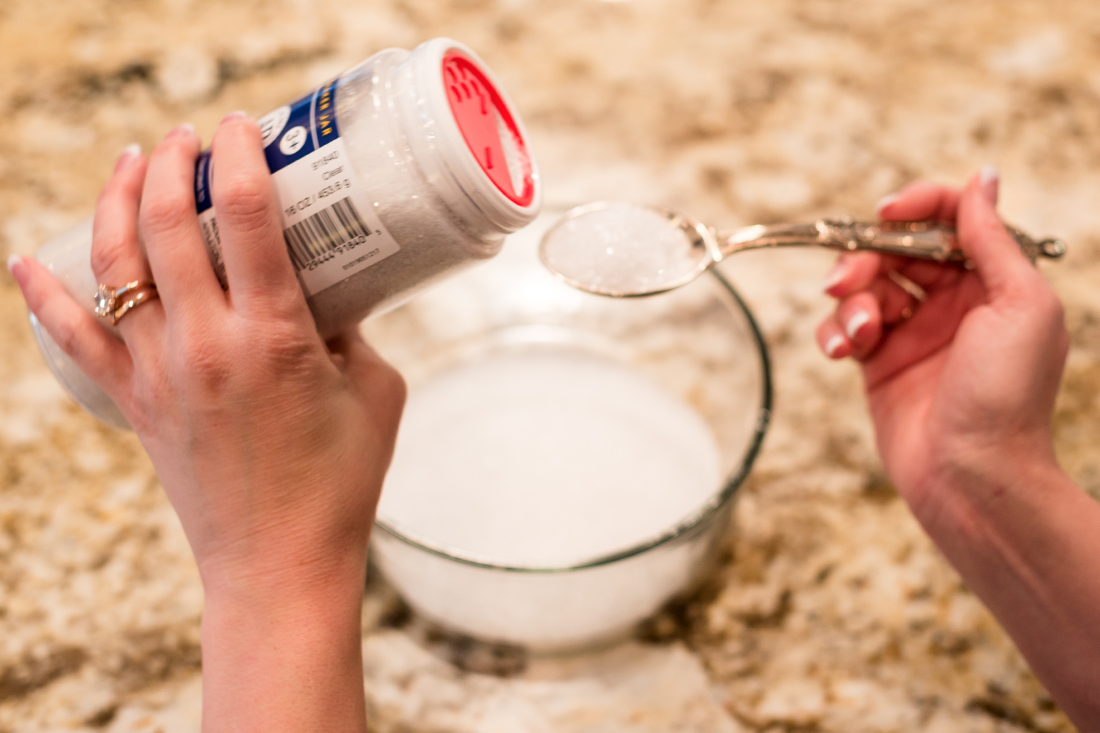
Step 1:
Start by mixing your snow! Add 1 cup of salt to 1 Tbs of glitter and mix in medium to large bowl. You may need more depending on how many mason jars you’re decorating. We ended up needing double for our 5 mason jars!
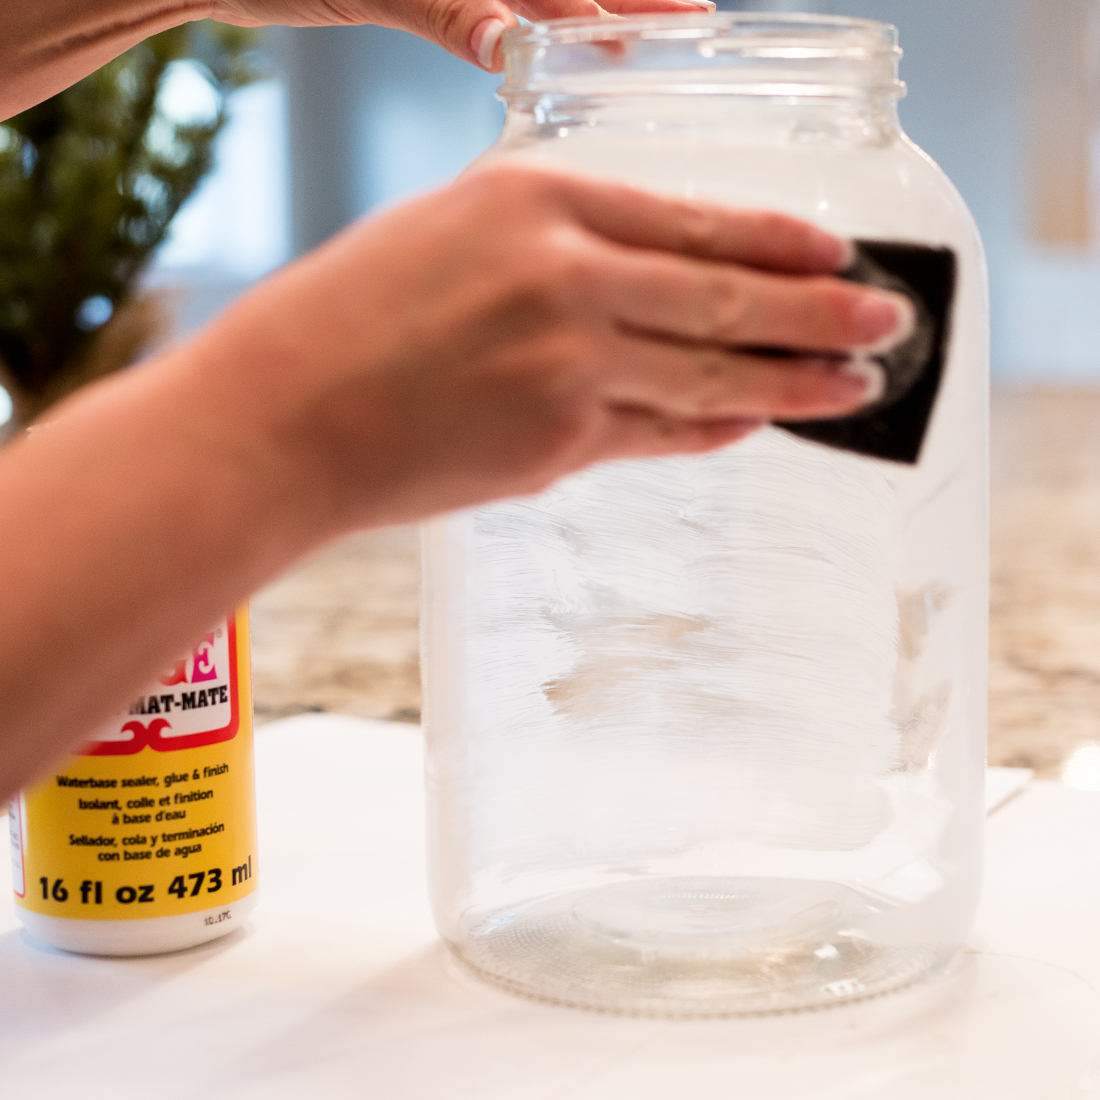
Step 2:
Using a foam paint brush, cover the entire outside surface of mason jars with thin layer of Mod Podge.
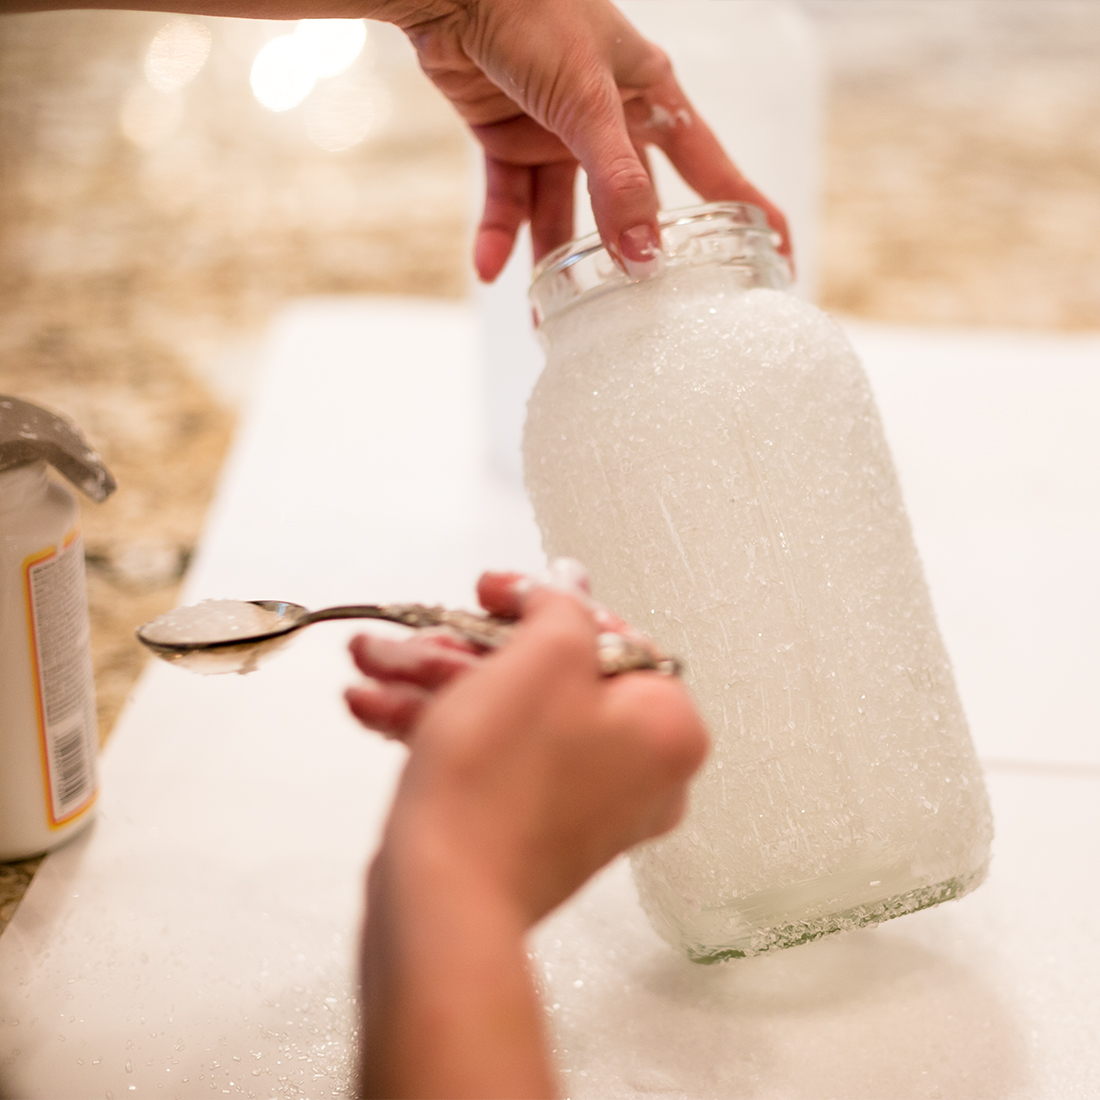
Step 3:
Sprinkle snow generously over mod podge coated mason jars. After all mason jars are coated with snow, let dry for 1 hour.
Step 4:
Once dry, decorate the rims! This is where your hot glue gun will come in handy. Have fun and get creative! We tried to decorate each mason jar rim differently! Some had pine cones, some had cherries, and some just had pine needles! It really completed the whole look once they were all paired together. Once done, add a tea light candle to each jar!

Step 5:
Time to put your interior design hat on and start placing them around your home! We placed one on the coffee table, a few by the fireplace, and a few bigger ones outside on the front porch!


Happy Holidays!


No Comments