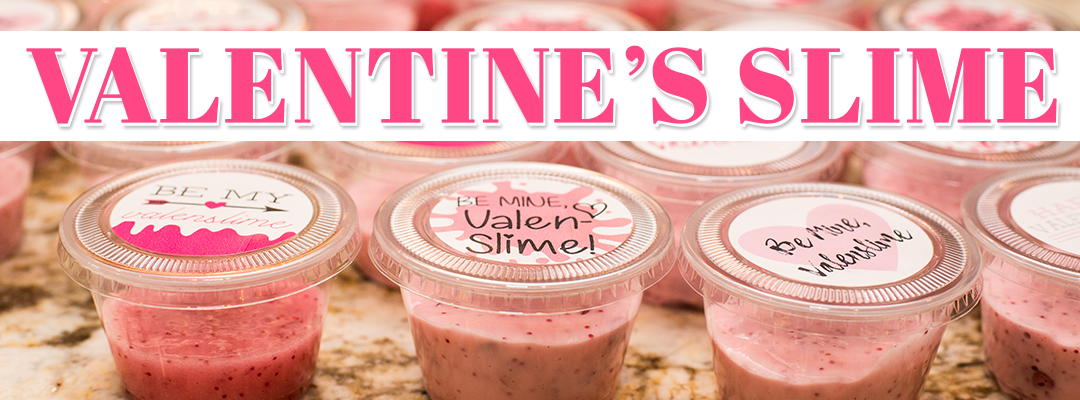
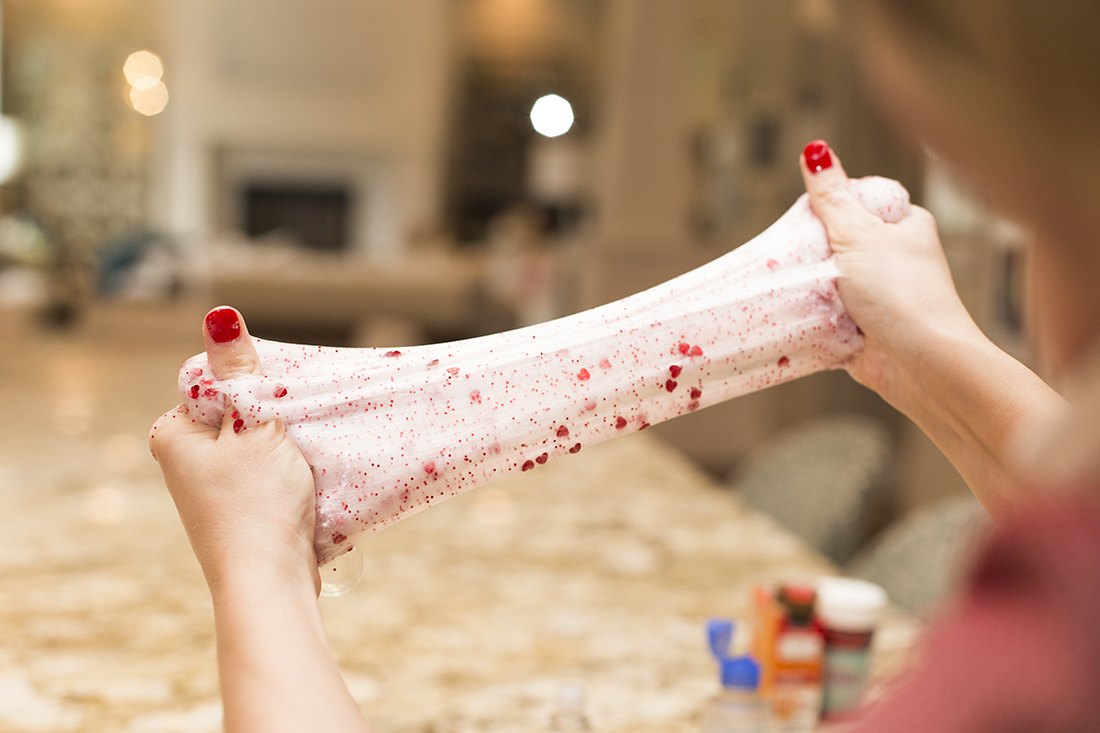
We couldn’t let Valentine’s Day arrive without making slime to celebrate! Valentine’s slime is simple and easily one of the funnest DIY’s we’ve done to date. We quickly realized that even though this is for kids, us adults found it hard to put down! It’s so squishy! Who doesn’t love to squish things in their hands?
Many people try to make their own slime from a recipe, and half the time it ends up not turning out! That’s why we are so excited to share with you this accident proof slime recipe! We made several batches and they ALL turned out exactly the same. So slimy and so squishy!
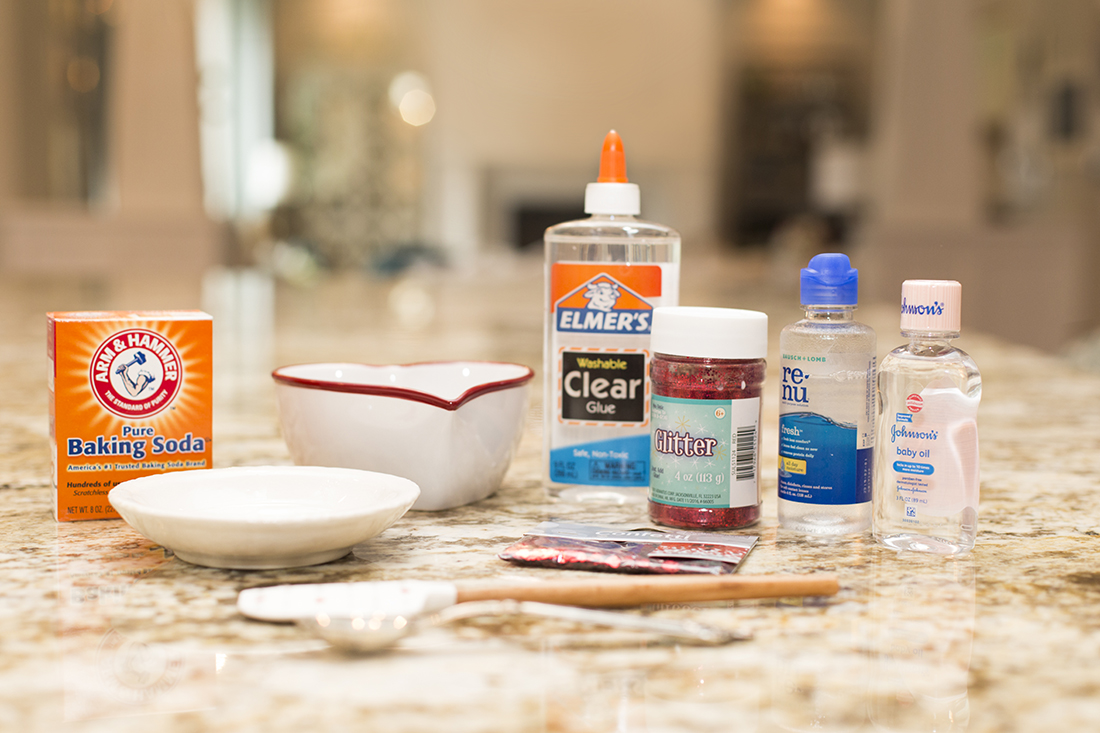
Materials:
Clear or white Elmer’s Glue
Contact solution
Baking Soda
Red hearts and glitter
Baby Oil
4 oz plastic container cups with lids
2 inch Circle stickers so you can print out our FREE printables! (The Avery brand from staples/office depot works great too!)
*We linked all our exact products used, so feel free to click the links above to shop!*
Step 1
Start by adding the entire bottle (6 oz.) of glue to a mixing bowl then add 1 tsp. of baking soda and mix until well combined. Want to make a bigger batch? Just make sure for every 6 oz. you add, you add an additional 1 tsp of baking soda.
Step 2
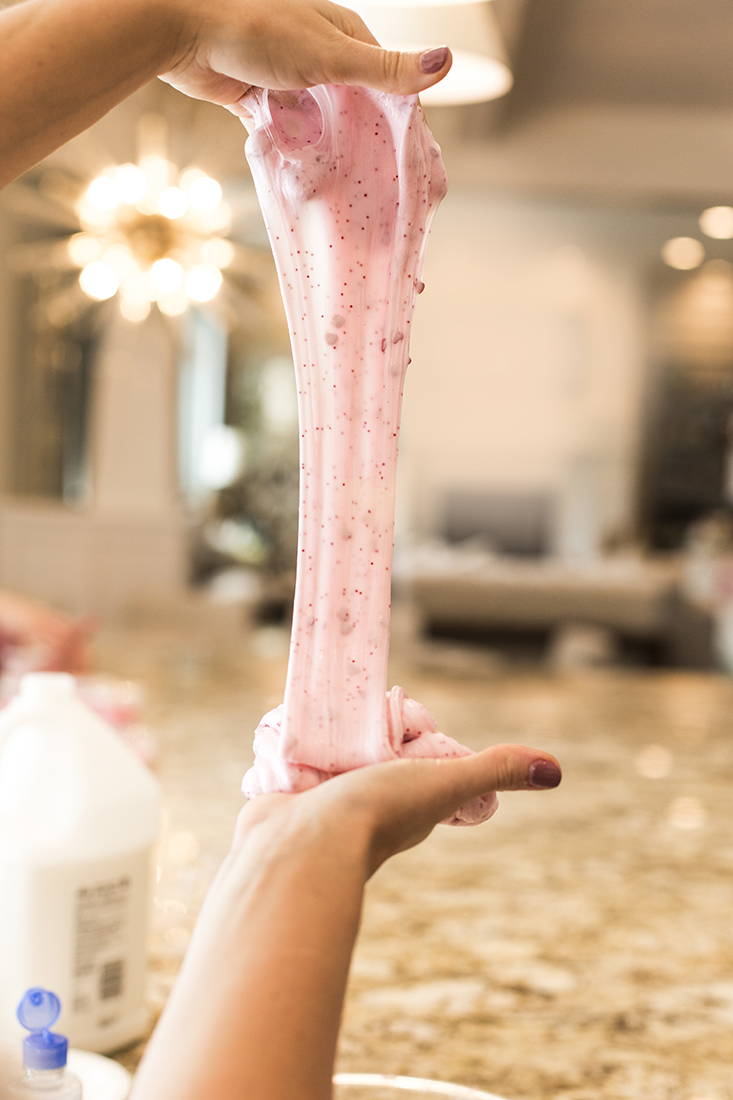
Before adding the activator (contact solution) this is where you will want to make sure to add all the pretty things! Glitter, hearts, food coloring, and so on! Be conservative! Only add 1-2 drops of coloring, 1-2 Tbs or glitter and/or hearts then mix away until well combined!
Step 3
Add the contact solution into the mixture in small amounts, stirring each time. The slime will start to get sticky quickly. Keep adding the solution slowly until the slime is sticky enough to start kneading with your hands. Continue kneading making sure to add contact solution until the slime reaches the consistency you like.
Step 4
Add a small splash of baby oil! This is optional but makes the mixture not stick to you and keeps your hands moisturized!
Step 5
Start dividing your slime evenly into your 4 oz plastic containers. Depending on how many students are in your child’s class, you may need to make a few more batches to fill your containers.
Step 6
Download our FREE printables here. Print out and place a sticker on top of each lid.


No Comments