Mother’s Day has always been the go-to holiday for homemade gifts. It makes sense — creating something with your own two hands is the perfect way to show someone how much you truly appreciate them! But let’s be honest, although they are great keepsakes, homemade gifts aren’t always practical. (How many places can you actually wear a macaroni necklace?) In today’s post, we’ll show you how to make 3 DIY Mother’s Day gifts that are kid-friendly AND things you’ll want to use every single day. Whether you’re giving your kiddos some fun ideas or making something for your own mother, you will fall in love with these DIYs!
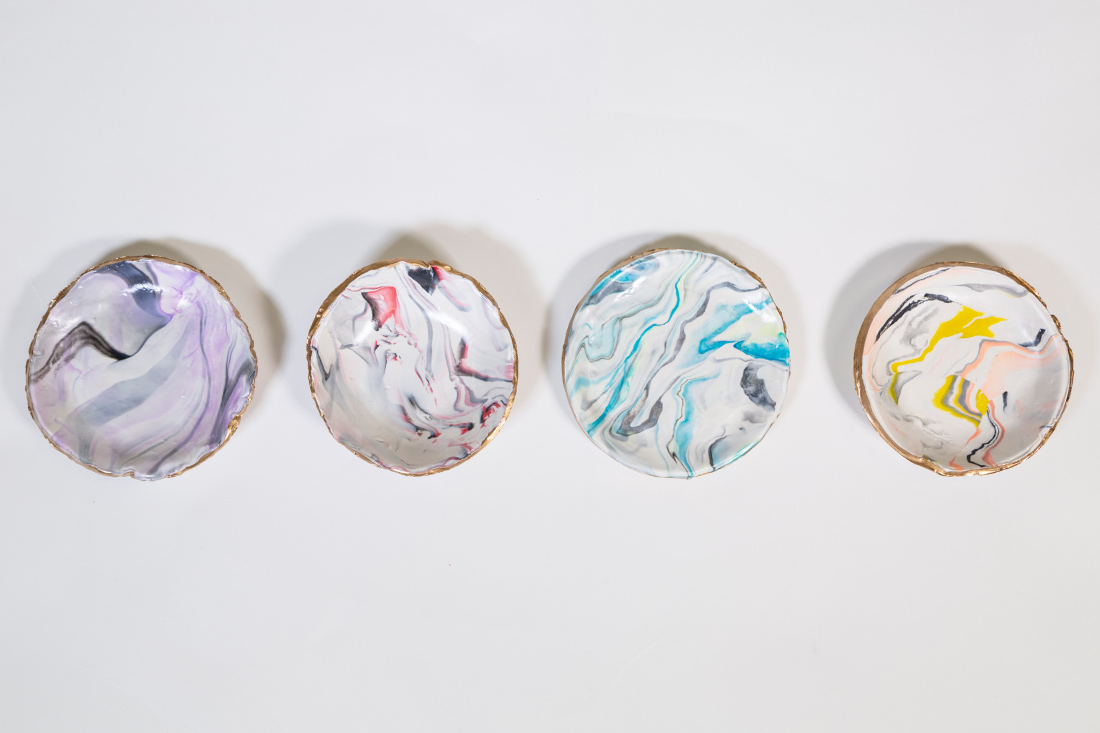
Marble Ring Dish
These trendy ring dishes look like they came straight from the store, when in reality they are super easy to make at home! Our favorite thing about this DIY is that each dish comes out totally unique, even if you use the same colors every time. Plus, your kids will have a blast playing with the clay!
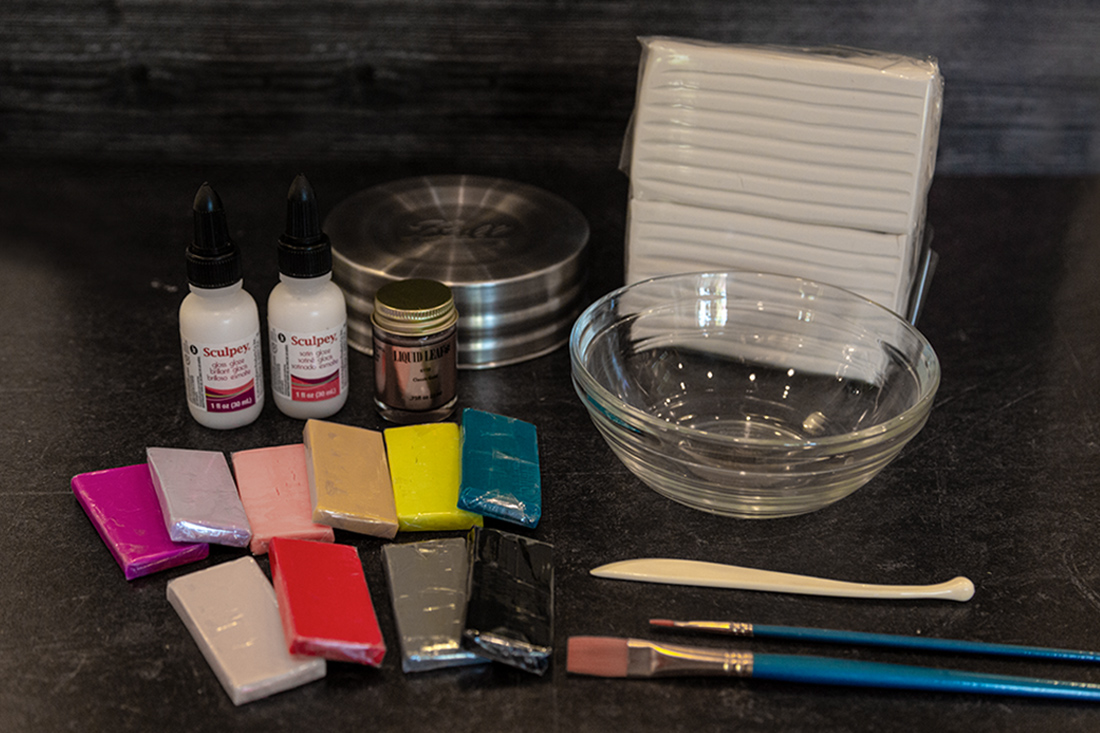
Supplies
Oven bake clay (white, black, gray, colored)*
Clay knife
Rolling pin
Large jar lid, approx. 6″ in diameter**
Small oven-safe bowl
Small paintbrush
Gold liquid leaf paint
Glaze, satin or gloss (optional)
*You will need a lot of white clay, and only a little bit of the other shades. We used 1.75 lbs. of the white clay and just a few ounces of the colored clay to make 4 dishes.
**This is for tracing out the shape of the dish. If you don’t have a jar lid, anything circular should work.
Directions
1) Preheat your oven as directed on the clay packaging. We set ours to 275 degrees.
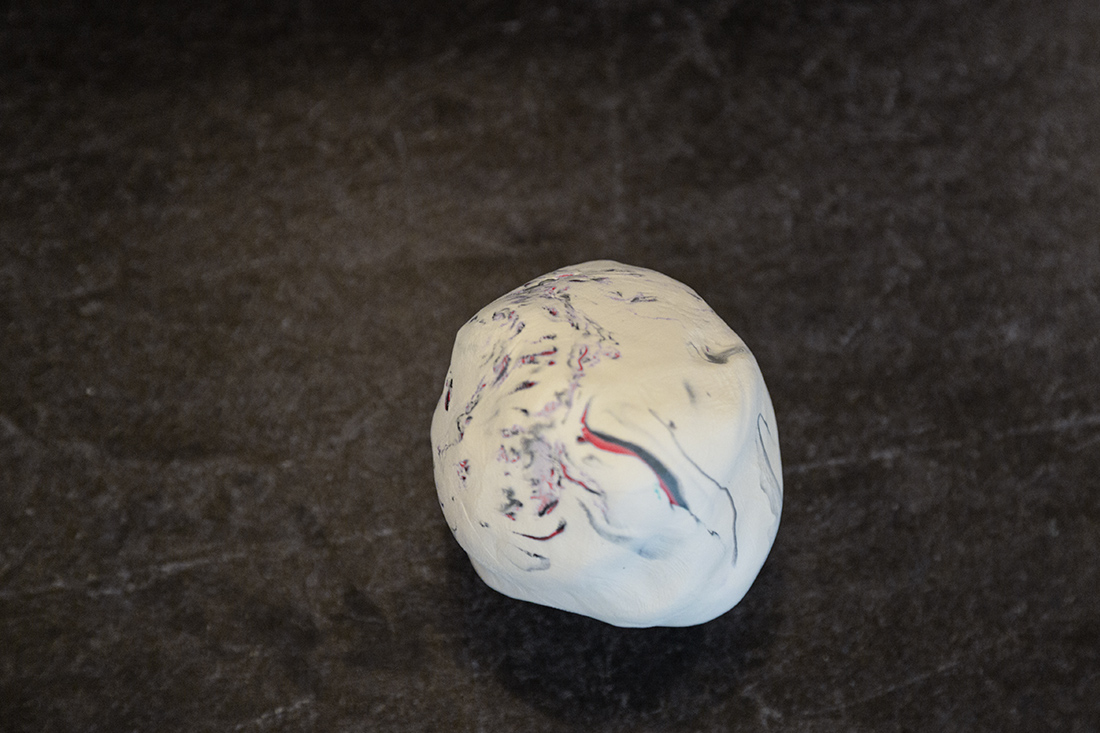
2) Start with two large blocks of white clay and four smaller blocks of black, gray, and two colors of your choice.We don’t have exact measurements, but you can use our picture below as a guide for how much you’ll need. Roll each block into a snake about 5″ long.
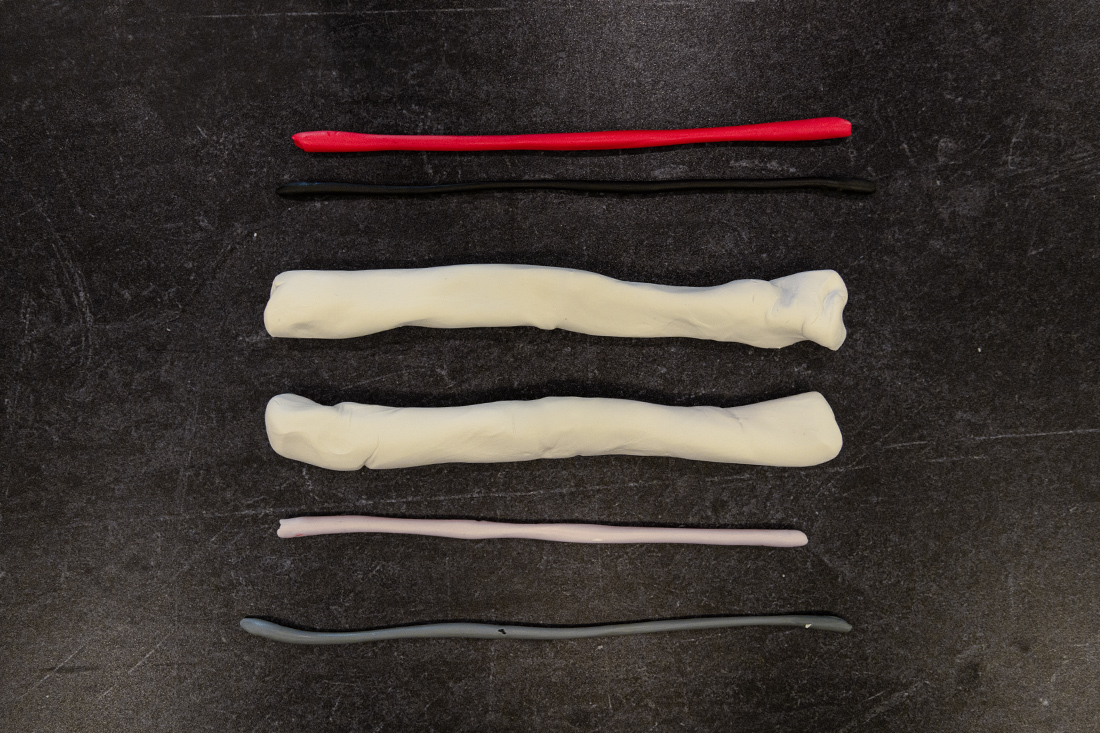
2) Gather all six rolls of clay and twist them together to make one large piece. Roll the combined clay into a snake, occasionally twisting the ends in opposite directions to create a candy cane pattern. Continue rolling until the clay is smooth and twice its original length. Then fold the clay in half, twist it together, and roll it again. Repeat this process 2 – 3 times, ending with a smooth, rolled out snake.

3) Smoosh the clay into a ball and roll it around until smooth. Most of the color should be on the surface. If not, cut the ball in half, smoosh it together, and roll it again until the desired amount of color is on the surface of the ball.
4) Using a rolling pin, roll out the clay to 1/4″ thickness.

5) Place the jar lid on top of the clay and use the clay knife to cut around it, making a circle.
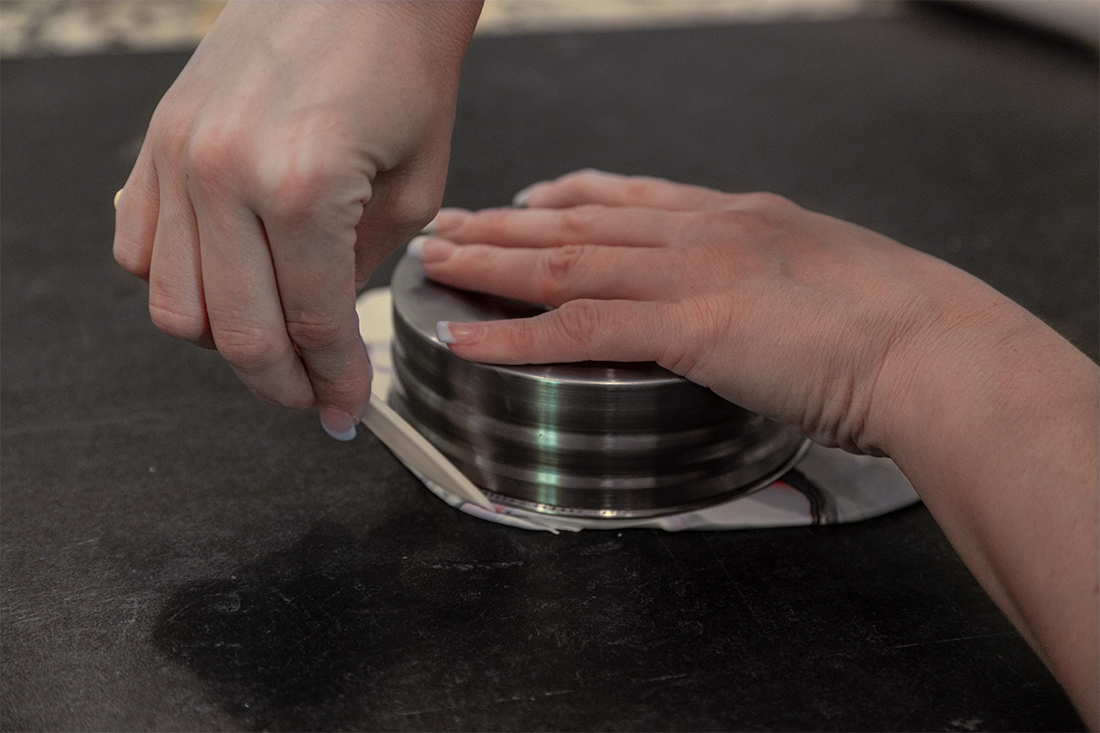
6) Place your circle of clay in an oven-safe bowl, lightly pressing down to fit the clay to the shape of the bowl. Make sure you don’t press too hard as it can make the clay difficult to take out of the bowl once it’s baked. Keep in mind that the size of bowl you use will change the depth of the dish. For instance, a larger bowl will make a more shallow dish whereas a smaller bowl will make a deeper dish.
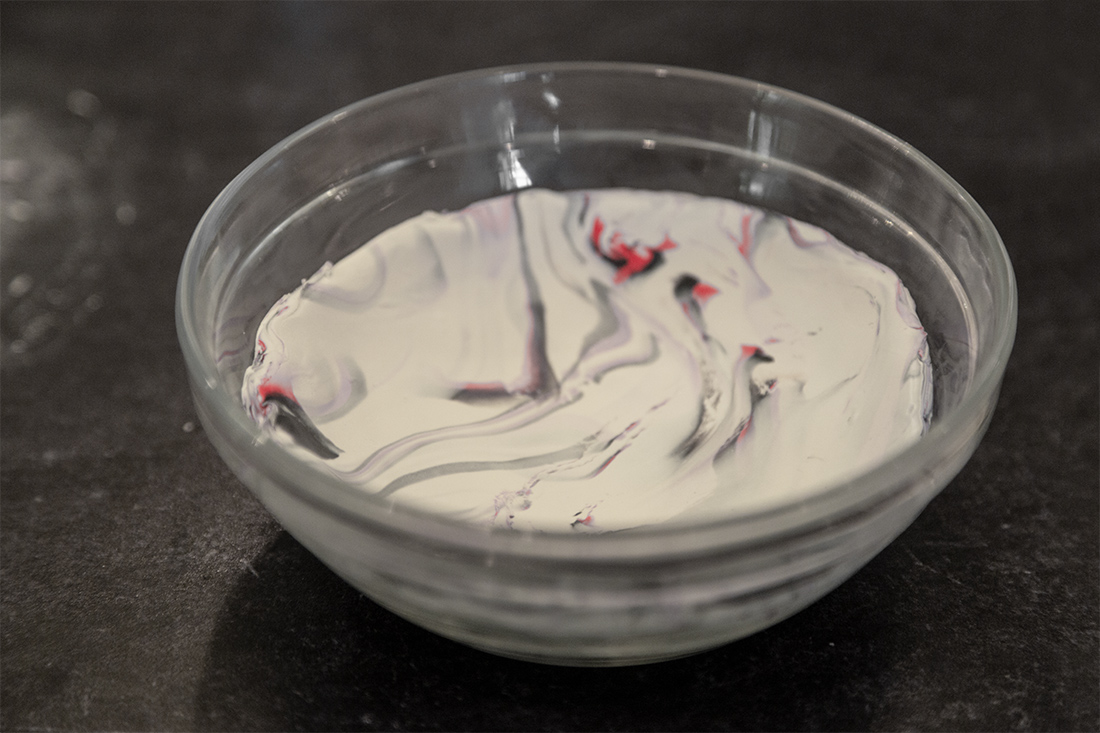
7) Bake your clay as directed on the package. We baked ours for 15 minutes. When your dish is finished baking, let it cool before taking it out of the bowl.
8) Remove your dish from the bowl and paint the edges using the gold liquid leaf paint. Once the gold paint has dried, you can seal the dish with a gloss or satin glaze if desired.
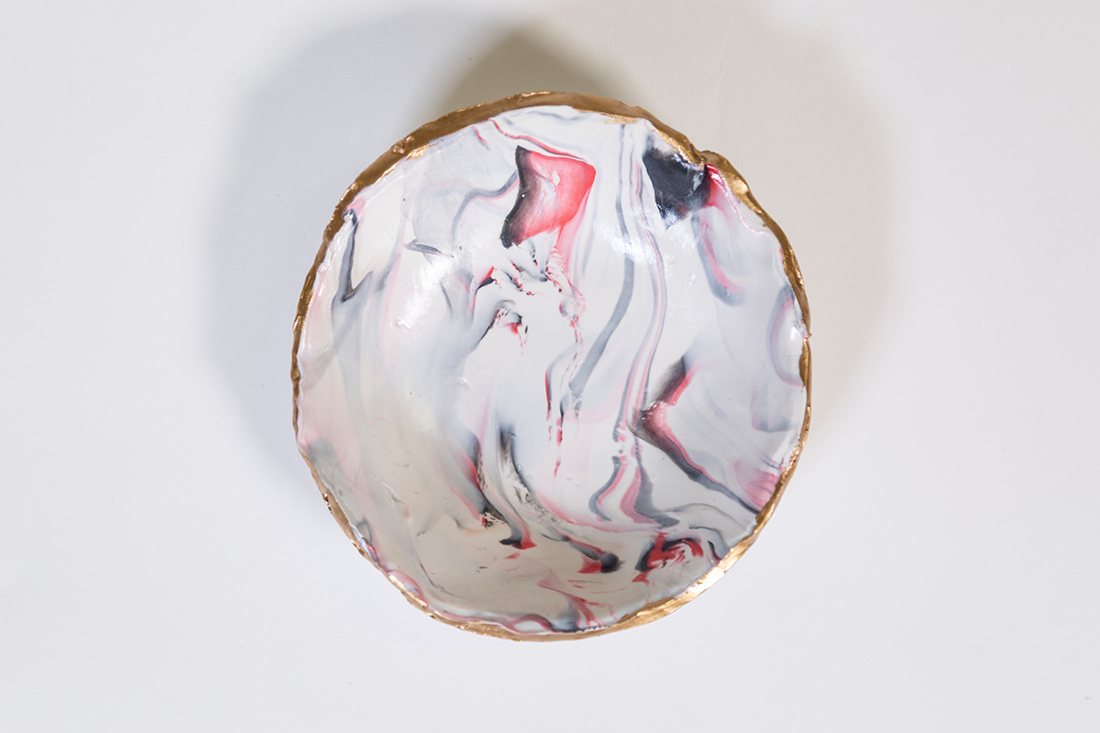
We love how customizable this gift is! We played around with different colors and bowl sizes and were super happy with each result.


Credit: A Beautiful Mess
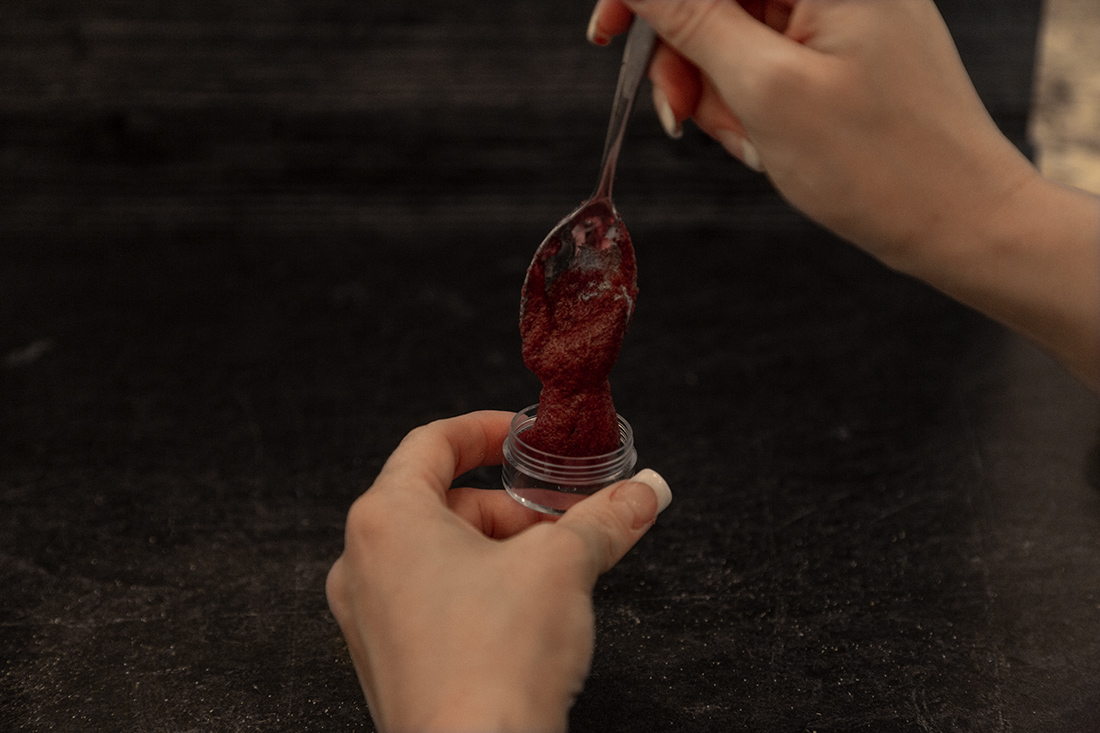
Kool-aid Lip Balm
You know any DIY using Kool-aid is going to be good! This lip balm consists of only four ingredients and a few simple steps. The Kool-aid gives your lips a pretty tint, and it tastes and smells amazing, too!

Supplies
2 Tbs. coconut oil
1/2 pkg. of Kool-aid
1 tsp. sugar
Water, enough to form a paste
Empty lip balm containers*
*You can recycle old lip balm containers, or buy empty jars from a craft store.

Directions
1) Microwave the coconut oil for 5 seconds to soften. If it’s still too hard, you can add a few seconds, but be careful not to melt the oil completely.
2) In a separate bowl, add half a packet of Kool-aid and mix in enough water to form a paste. Pour in the sugar and combine well.
3) Add the coconut oil to your paste and mix until smooth. This process might require some extra effort because the oil and paste don’t combine very well at first.
4) Pour the mixture into an empty lip balm container and let it sit to harden. This may take some time, so you can speed up this last step by placing the lip balm in the refrigerator if needed.
That’s it! We were able to fill up 3 jars per flavor of Kool-aid used, making 9 jars total! This is a great DIY if you have a few mothers to give gifts to this year.

Credit: Adventures in All Things Food
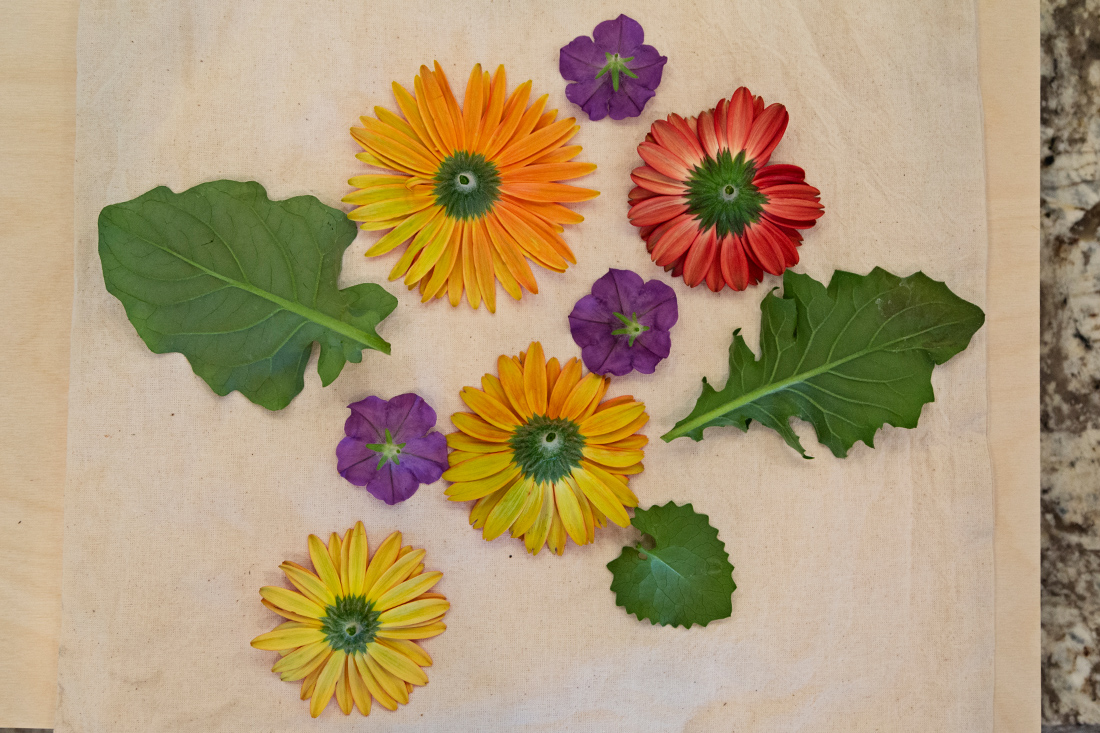
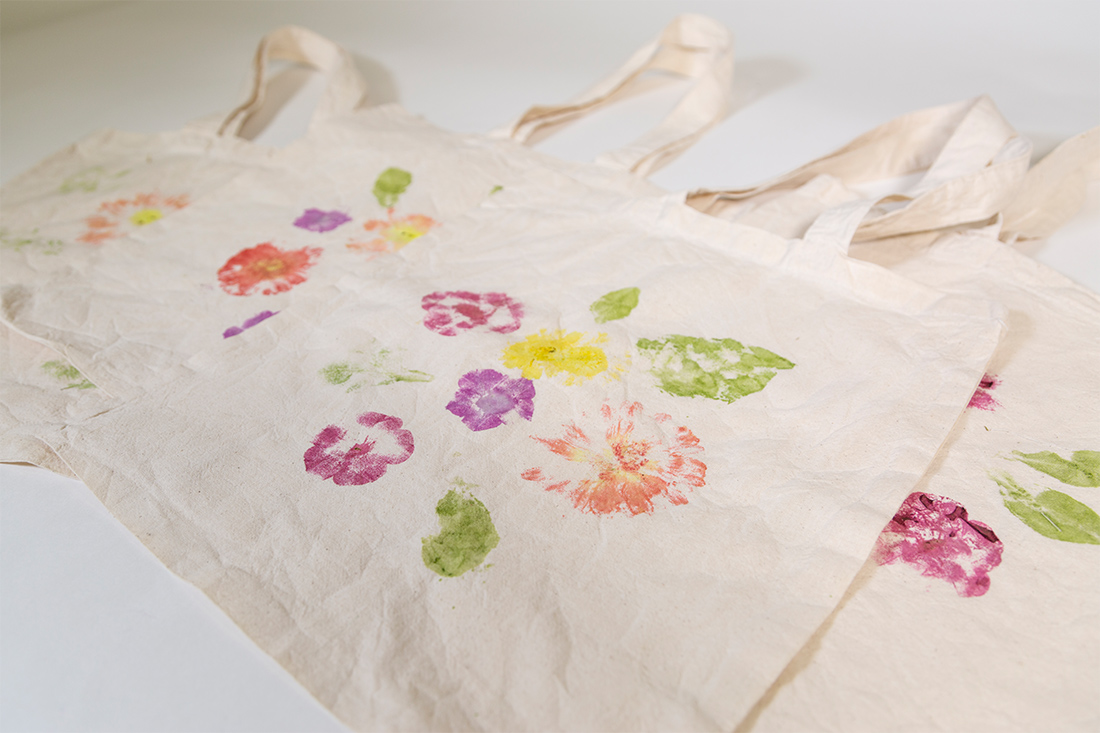
Flower Dyed Tote Bag
This is such a fun activity for the kids, but you will probably have to teach them some hammer safety first! That’s right, this DIY consists of hammering flowers onto a tote in order to dye it. Super cool! Keep in mind, there is some trial and error with this DIY because each flower requires a different amount of pressure to release the dye. You may want to practice a few times on a piece of paper before using the bag. In the end, each design was very pretty, and this is definitely a gift you’ll want to take with you everywhere!

Supplies
Cotton tote (not canvas)
Alum powder
Rubber gloves
Parchment paper
Flowers
Masking tape
Wooden board
Hammer
Directions
1) First, you will need to prep the bag for the dying process. Wash your bag to remove any residue, then soak the bag in a solution of 1/4 cup alum powder and 2 cups hot water. Let the bag air dry, then use an iron to get the wrinkles out.
2) Trim the flowers and leaves you want to use and arrange them face down on the bag in whatever pattern you desire.
3) Use the masking tape to secure the flowers to the bag. The flowers do break apart easily during the hammering process, so be sure to use a lot of tape on this step.
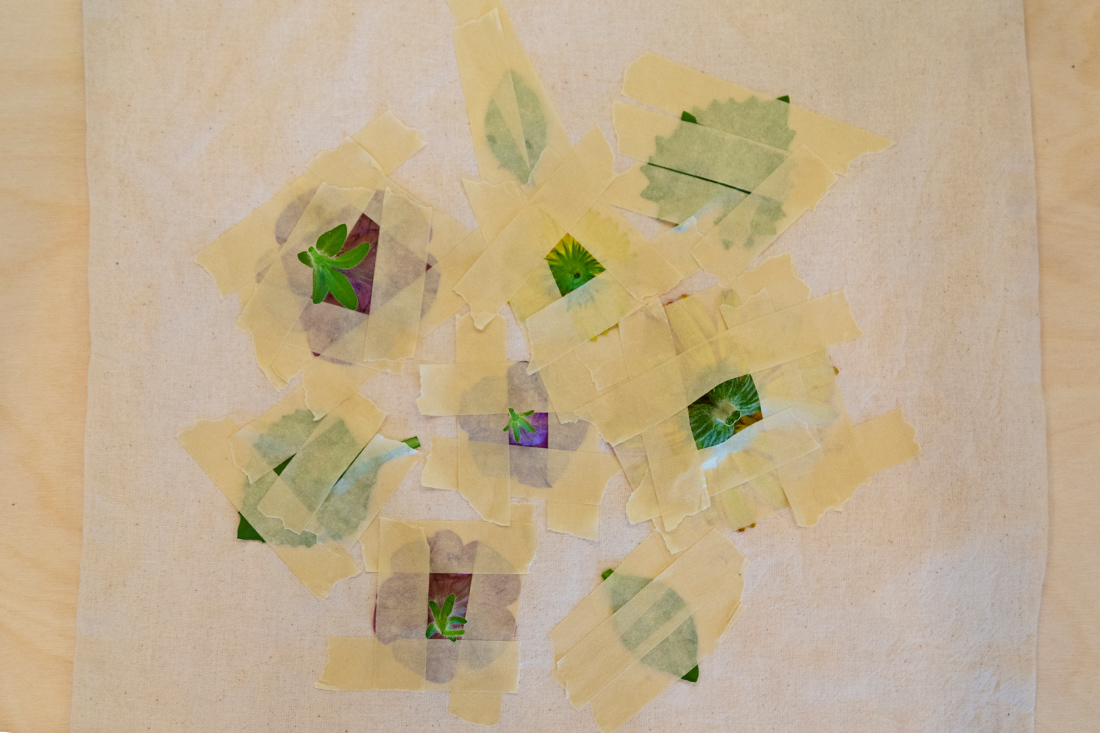
4) Place the bag on a wooden board and hammer the flowers to dye the bag. Make sure you hit every part of the flower so the entire shape shows up.
5) Remove the tape and flowers to reveal your design. You can add more flowers or leaves however you see fit until you achieve the pattern you want!
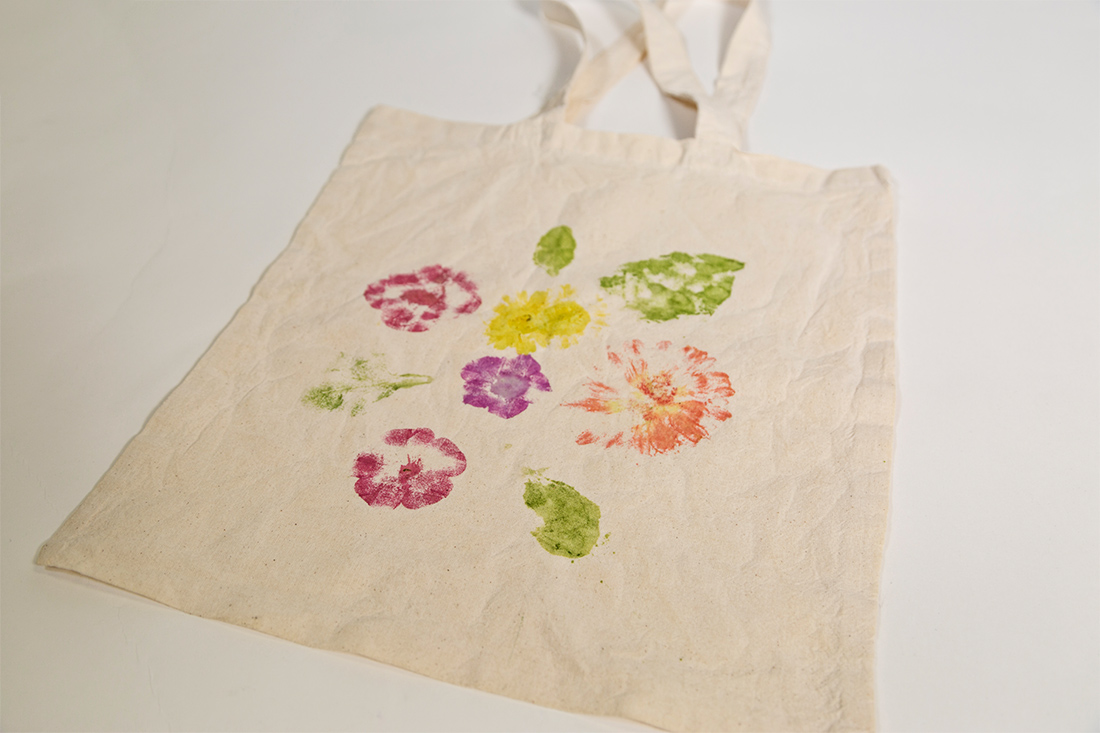
Credit: DIY Candy
No Comments